
How to Make a Christmas Tree Brooch: From Production to Shipping
We take you through one real Christmas tree brooch project, from choosing Zamak 3 and running the first die-casting cycle to polishing, plating, inspection, individual packing, and shipment.
When we develop seasonal metal accessories, we know the small details are what customers notice first. A Christmas tree pin has to feel festive at a glance, but on our production floor we are also watching the relief, edges, plating surface, back-pin position, and packing method. If your sourcing team is searching how to make a brooch christmas tree, this is how we turn an approved Christmas-tree design into a repeatable zinc-alloy product for bulk production.
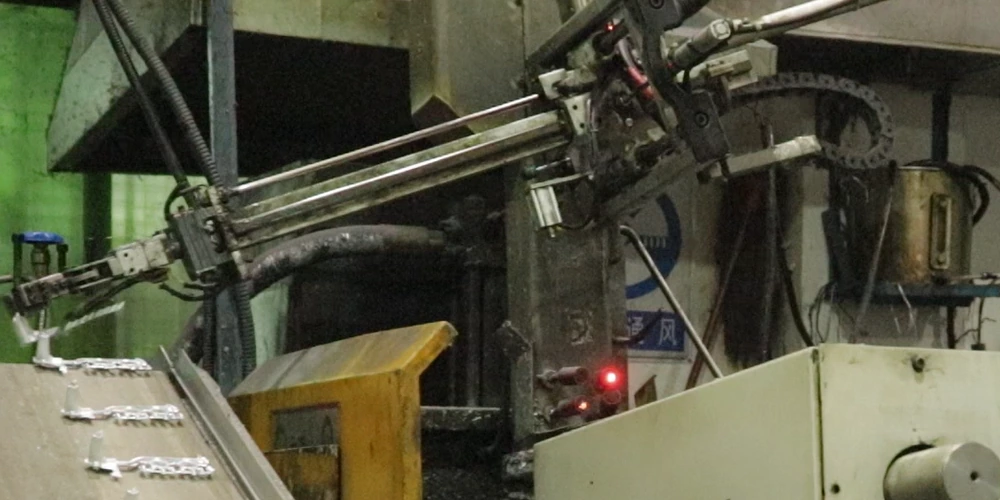
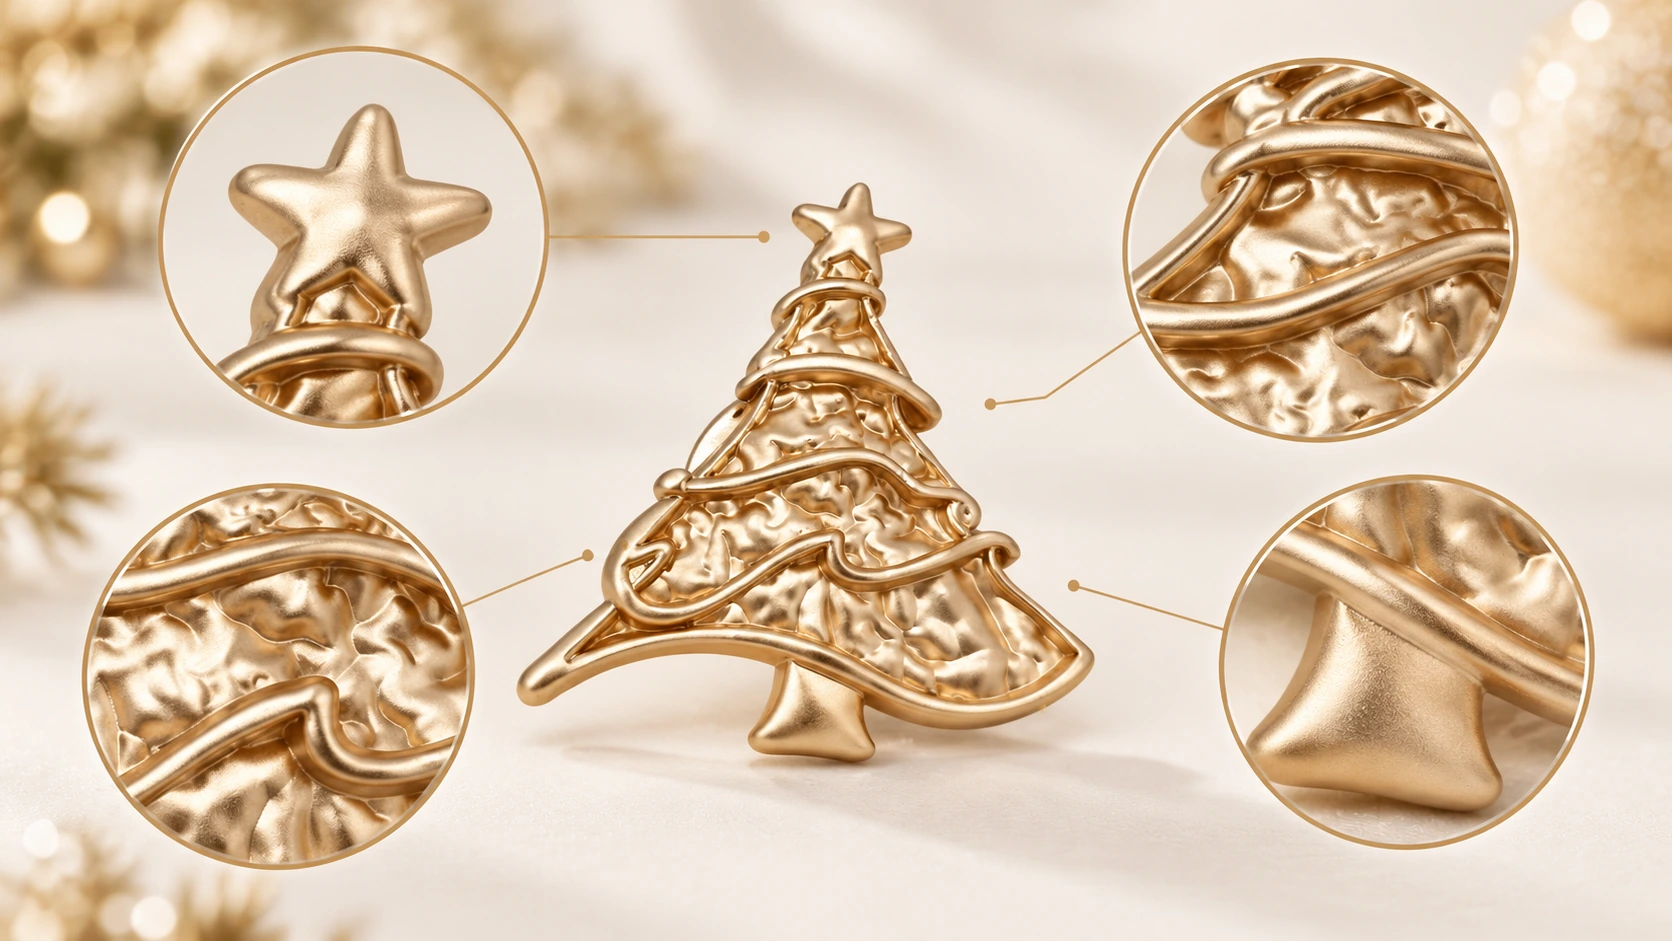
For this project, we are making a vintage-inspired gold Christmas tree brooch with a star at the top, raised garland lines, layered branch details, and a muted matte champagne-gold finish. We use a pin post with a stainless-steel butterfly clutch on the back, so the finished piece can be worn on coats, jackets, scarves, thicker fabrics, holiday uniforms, or even used in gift and retail presentation. The approved color reference for the finish is PANTONE 10400 U.
Why We Choose Zamak 3 for This Brooch
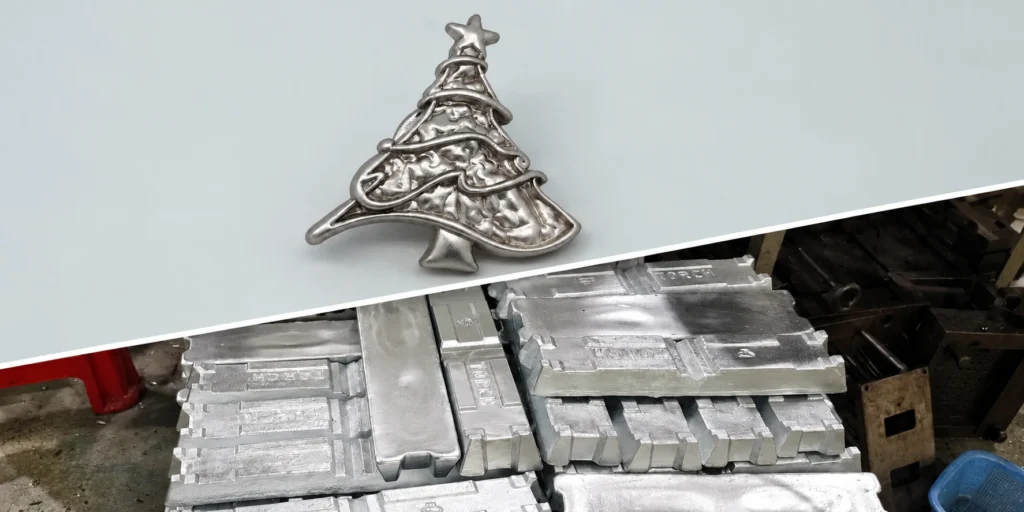
We start with Zamak 3 zinc alloy because this small decorative part needs to do several things at once: fill the fine relief, hold the tree silhouette, survive later polishing, and provide a clean base for plating. In our experience, Zamak 3 gives us a practical balance between detail reproduction, production efficiency, and surface-finishing quality.
- Good castability — when the molten alloy enters the mold, its flow helps us reproduce the star, branch edges, recessed texture, and raised garland details cleanly.
- Surface-finishing compatibility — after casting, we can polish and electroplate the alloy efficiently, and the same base material also leaves room for future paint, powder-coating, or alternative finish development for other christmas brooches.
- Dimensional stability — this matters to us because a seasonal order is not judged by one perfect sample; every cavity and every batch needs to stay visually consistent.
- Lower thermal load on the mold — Zamak 3 melts at a relatively low temperature, which supports efficient die-casting cycles and helps us reduce thermal stress on the tooling during repeated production.
For this project, we use about ±0.1 mm as a practical die-casting tolerance reference. We still confirm the final achievable tolerance from the actual geometry, wall thickness, draft, and the inspection standard agreed with the customer.
Our Production Flow: From Tooling to Individual Packing
Our standard die-casting route is mold design, die casting, trimming, polishing, plating, inspection, and packing. On this christmas brooch project, we also add pin-post assembly before plating and individual packing at the end because that is what the customer requested.
1. We Prepare the Mold: 1 Mold, 8 Cavities
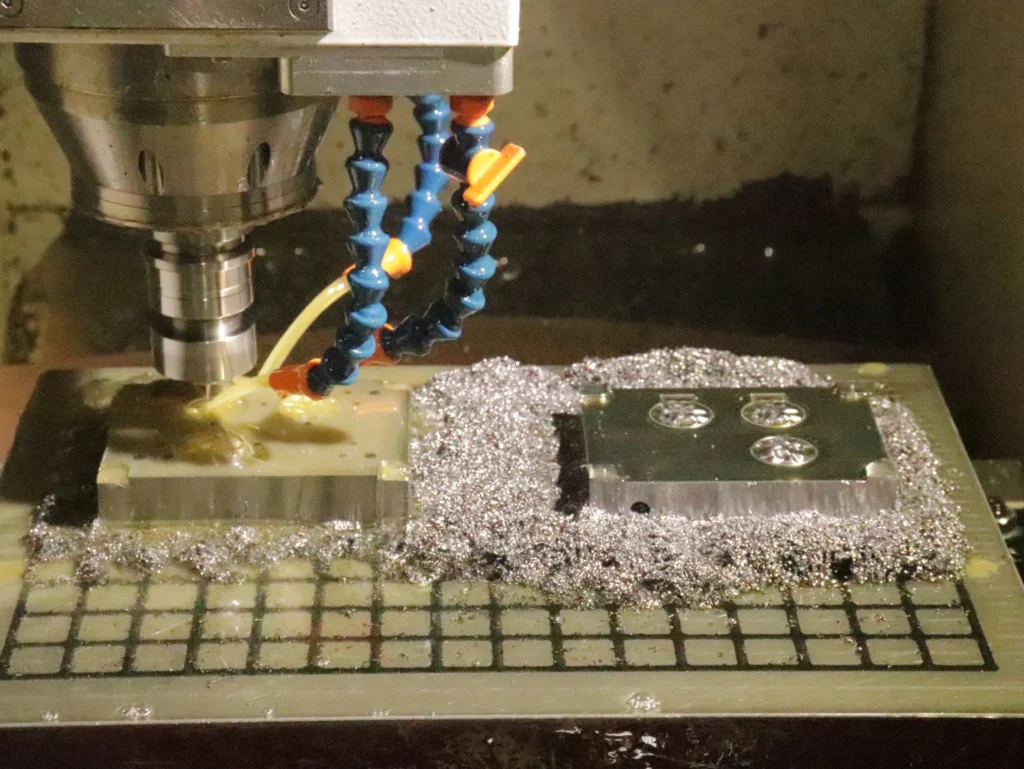
Before we start bulk production, we turn the approved Christmas-tree geometry into a production mold. This project uses a 1-mold/8-cavity layout, so every time the mold closes and opens, we can form eight brooch bodies in one cycle. At this stage, we pay close attention to metal flow, venting, gates, release, and whether all eight cavities can fill consistently.
For a seasonal order, this multi-cavity layout gives us the output we need without changing the approved design. We are not only trying to cast faster. We are checking that the star, garland lines, branch edges, back assembly area, and overall outline look the same from cavity to cavity.
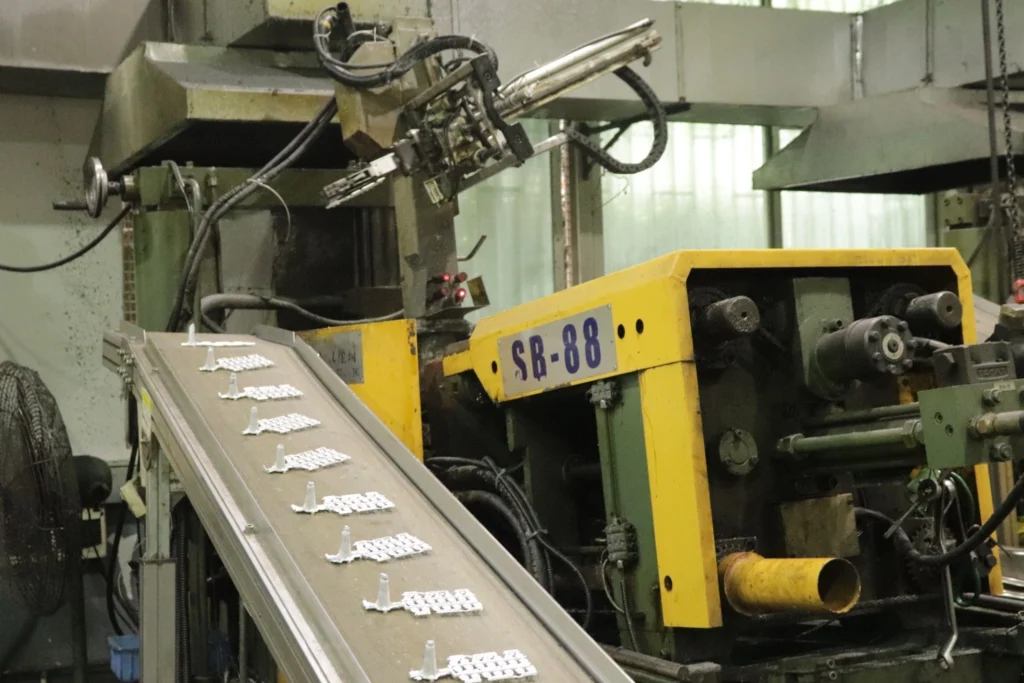
2. We Run the SB-88 Automated Die Casting Cell
Next, we move the mold to our SB-88 Automated Die Casting Cell, an 88T-class zinc-alloy production system. With this project setup, the 8-cavity mold gives us eight brooch blanks in about a 10-second die-casting cycle. Standing at this stage of production, the first thing we look for is whether every cavity has filled completely before the parts move forward.
When the freshly cast blanks come out, we inspect the areas that define the product: the star must be complete, the branch outline must stay sharp, the raised garland needs to read clearly, and the rear area must remain suitable for the later pin structure. If those details are weak here, no later polishing or plating can truly bring them back.
3. We Trim, Grind, and Polish Each Blank
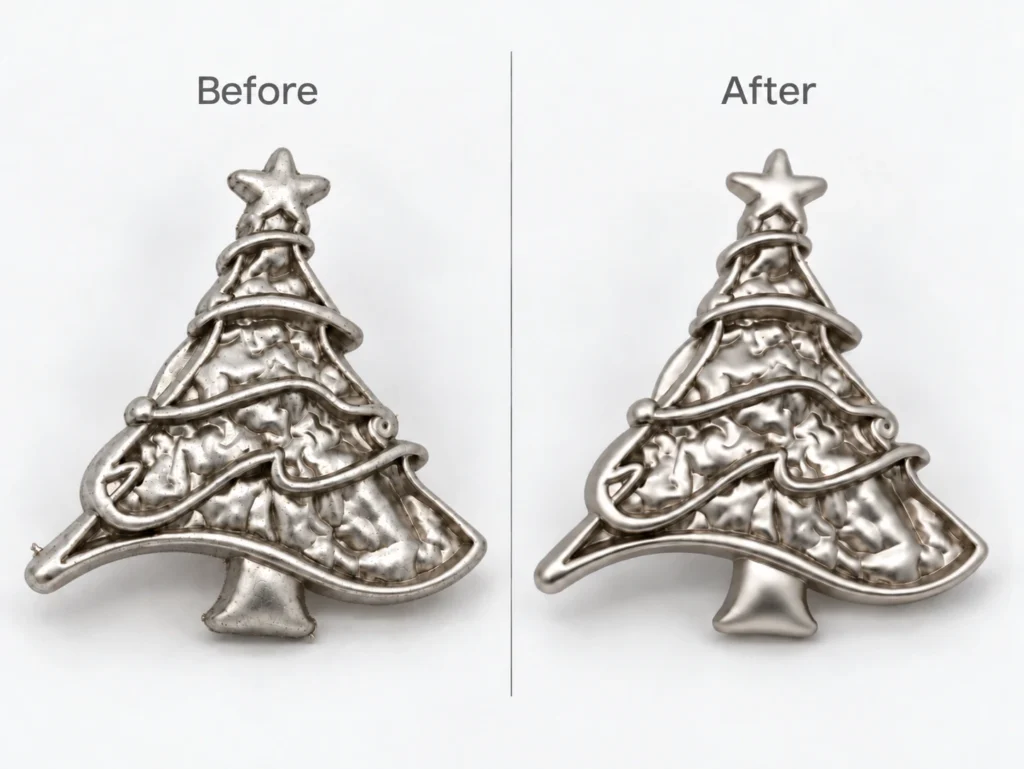
Once the castings leave the machine, we remove the gates, flash, and excess material, then move into grinding and polishing. This is one of the stages where we can immediately see the product becoming more refined. We smooth the perimeter and clean the surface because any casting mark left underneath can become more obvious after plating.
At the polishing station, we have to be careful not to chase smoothness too aggressively. We want the edges to feel clean in the hand, but we also need to preserve the raised garland and layered branch relief that give this christmas brooch its vintage three-dimensional character.
4. We Assemble the Pin Post Before Plating
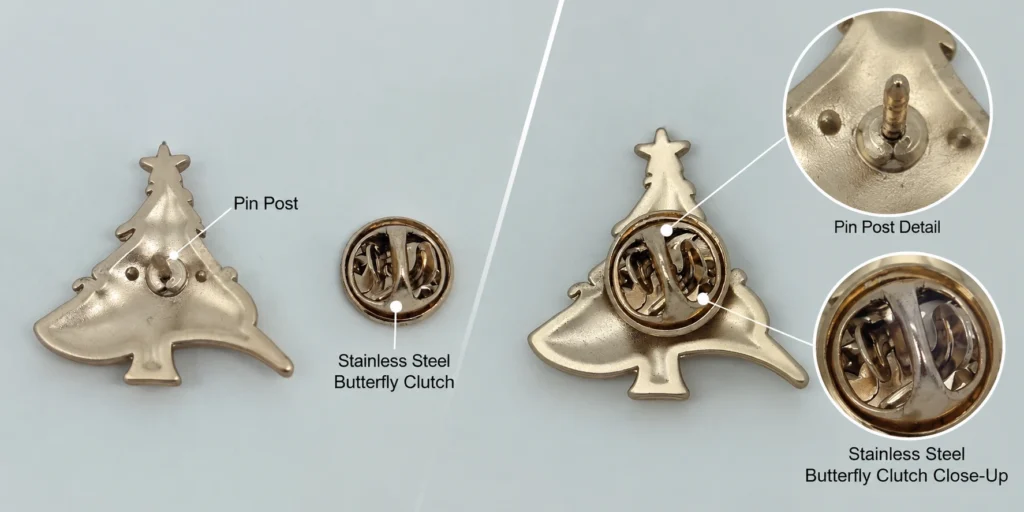
After the metal body is cleaned and polished, we assemble the rear pin structure. The finished brooch uses a stainless-steel butterfly clutch, which gives the wearer a familiar removable fastening system for coats, jackets, scarves, and other thicker seasonal materials.
Before we send the parts to plating, we check the pin position and direction. We do this because the front of the brooch can look perfect, but if the back pin is off-center or angled incorrectly, the product may tilt when worn. That small assembly detail can change the final customer experience.
5. We Plate the Brooch in Matte Champagne Gold
Then we move into aqueous electroplating, also commonly called wet plating. For this order, we follow the approved matte champagne-gold direction with PANTONE 10400 U as the color reference. The pin components and related rear hardware are handled according to the same finishing plan so the visible metal parts feel coordinated rather than pieced together.
When we see the plated pieces come back, this is the stage where the product finally starts to look like a finished Christmas accessory. The muted champagne tone still gives us the warm holiday gold people expect from Christmas decorations, but it is softer than bright yellow gold and works naturally with dark green, burgundy, black, cream, navy, wool textures, and winter gift packaging.
In B2B work, we use the Pantone number as a communication target, but we never rely on a screen alone to approve a plated color. Base metal, polishing level, matte treatment, lighting, and viewing angle can all change the visual result, so we prefer to confirm an actual plated sample before bulk production.
6. We Inspect the Finished Brooches One by One
After plating, we move the batch into final assembly and quality inspection. At the inspection table, we compare the parts against the approved sample and check the full tree outline, top star, raised garland lines, branch definition, plating consistency, surface scratches, sharp edges, pin function, butterfly-clutch fit, and overall handling quality.
We do not treat wear and corrosion resistance as something created by the plating step alone. The result depends on the Zamak 3 body, surface preparation, polishing, plating, careful assembly, and final inspection working together. That is why we keep quality checks throughout the process instead of waiting until the last carton is ready.
When we inspect a holiday collection, visual consistency matters just as much as single-piece quality. Retailers may display dozens of christmas brooches side by side, so a noticeable color difference, soft relief, scratch, or crooked pin can weaken the presentation of the whole collection.
7. We Pack Each Brooch Separately and Prepare for Shipment
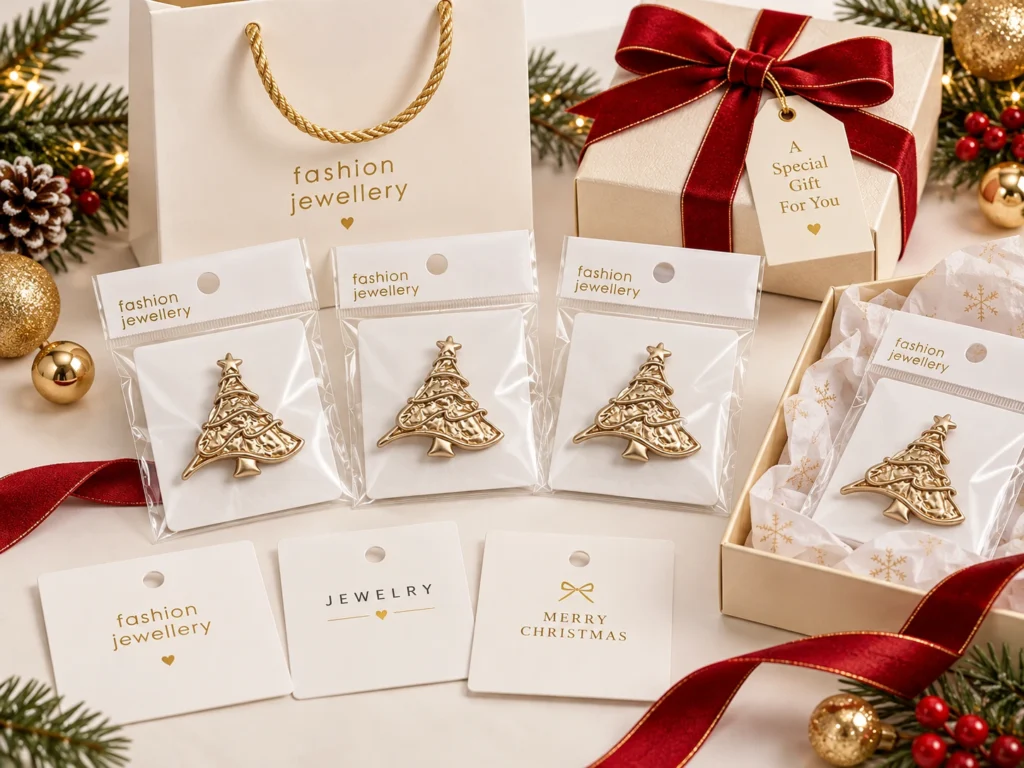
Once the batch passes inspection, we pack every brooch individually as requested by the customer. We keep the plated surfaces separated so they do not rub against each other during handling and transport, and the individual packs also make later retail distribution, gifting, holiday uniforms, or promotional use much easier.
If the project needs a more retail-ready presentation, we can continue from this stage with printed backing cards, clear retail bags, branded cards, small gift boxes, or other holiday-themed packaging. For us, packing is not an afterthought; it is the final step that protects all the work completed before it.
Why We Think This Christmas Tree Brooch Works as a Seasonal Product
When we develop a christmas brooch, we want the theme to be obvious before the customer reads any description. This design does that with the tree silhouette, top star, layered branches, and raised garland lines. The die-cast zinc-alloy body gives us more depth and tactile weight than a flat printed decoration, while the matte champagne-gold finish keeps the look festive without becoming too flashy.
- Clear festive identity — the tree, star, and garland details communicate Christmas immediately without extra printed graphics.
- Strong tactile quality — the die-cast body gives the piece real depth, weight, and a more substantial feel in the hand.
- Wear- and corrosion-resistant direction — with the correct pretreatment, plating, and QC system, we can build the product for repeated seasonal handling.
- Flexible use — we can position it for coats, jackets, scarves, holiday uniforms, gift sets, retail merchandise, packaging, and promotional events.
- Easy collection expansion — once this design language is approved, we can develop matching trees, bells, stars, wreaths, snowflakes, reindeer, and other Christmas decorationsin the same finish.
How We Can Expand One Gold Christmas Tree Brooch into a Full Holiday Collection
From our B2B point of view, the value of this project does not stop with one gold Christmas tree brooch. Once the finish, attachment standard, packaging system, and overall design language are approved, we can carry the same direction into matching christmas brooches with other holiday motifs and build a coordinated collection rather than isolated products.
We can keep the same matte champagne-gold tone, similar relief depth, repeated logo placement, and unified packaging across the range. That makes the collection easier to recognize as one brand story, whether it is planned for a department-store holiday program, corporate gifting, a fashion collection, hotel or retail uniforms, or a limited Christmas campaign.
What We Ask You to Send for a Faster Custom Brooch Quote
When a customer sends us complete project information at the beginning, we can review manufacturability faster, reduce back-and-forth communication, and prepare a more efficient sampling plan for the christmas brooch.
- Artwork or reference image — tree, wreath, snowflake, bell, reindeer, logo, or another holiday motif.
- Target size and thickness — we use these to evaluate relief depth, weight, and pin balance.
- Material requirement — for example, Zamak 3 zinc alloy or another approved metal.
- Metal color and finish — for example, matte champagne gold with a Pantone reference.
- Attachment — butterfly clutch, safety pin, alternative brooch back, or a custom structure.
- Logo position — front, back, initials, event year, collection name, or holiday message.
- Order quantity and target delivery date — seasonal projects are easier for us to schedule when we receive the timing early.
- Packaging — individual bag, backing card, branded card, gift box, or another retail package.
What Looks Like a Small Christmas Detail Is a Full Production Job for Us
By the time a shopper sees the finished brooch, most of our work is already hidden inside it: material selection, multi-cavity tooling, die casting, trimming, grinding, polishing, pin assembly, plating, inspection, and packing. That is our practical answer to how to make a brooch christmas tree — the festive appearance is the final result of many controlled production steps.
In this project, we use Zamak 3 for the detailed cast body, run the 1-mold/8-cavity tooling on the SB-88 production cell, produce eight blanks in roughly a 10-second cycle, finish the parts in PANTONE 10400 U matte champagne gold, inspect the batch against the approved sample, and finally pack every brooch separately before shipment.
If you are developing a Christmas collection, seasonal gift, fashion accessory, or promotional project, send us your artwork, target size, Pantone color, logo, packaging requirement, or reference image. We will review it with our production team and get back to you within 24 hours.
Email: sales012@wysecn.com
Website: https://buttonarea.com
WhatsApp: +86 13688844607
You form directly to us. can also click the text to submit the
FAQ
1. How do you ensure the pin post is installed in the correct position?
We leave a positioning feature on the back of the brooch during mold development. After die casting, the pin post can be placed into the preset position and secured along the edge, helping us keep the installation position and direction consistent from piece to piece.
2. What do you normally inspect during quality control?
We check the overall completeness of the brooch, the edges, raised patterns, surface finish, and plating color. We also inspect for scratches, sharp edges, pin function, butterfly-clutch fit, and whether the finished pieces remain visually consistent with the approved sample. buttonarea-how-to-make-christma…
3. Why do you use Zamak 3 for this Christmas tree brooch?
Zamak 3 gives us good mold filling, stable detail reproduction, and a suitable surface for polishing and electroplating. It helps us reproduce the star, branch edges, recessed texture, and raised garland details while keeping the product suitable for repeat production.